LED Grille Emblem for Mercedes G-Class: The Complete Upgrade Guide 2026

Author: Jasper | RacingPartsWorld G-Class Parts Specialist | 10+ years experience in Mercedes G-Class aftermarket parts and performance upgrades

Introduction

The grille emblem is the single most recognized mark on the front of your G-Class — the badge every driver ahead of you sees in their mirror. A standard emblem is static. An LED grille emblem turns that signature into a light signature: a clean, illuminated centerpiece that announces the vehicle the moment it approaches, and ties the front end together with the LED lighting program.

This guide covers LED grille emblems for the G-Class — the style options, brightness and quality considerations, platform compatibility across W463, W464, and W465, installation in under an hour, and how the emblem fits into a complete front-end lighting build.

Why Upgrade the Grille Emblem

Three reasons owners make the LED grille emblem their first front-end lighting upgrade:

  • Visibility: an illuminated emblem makes the G-Class instantly recognizable at night — a presence upgrade that works whether you are parked or driving
  • Cohesion: the emblem is the center of the front fascia; adding light to it completes the symmetry with LED headlights and grille lighting
  • Identity: the emblem is the visual anchor of the grille. A smoked or illuminated emblem sets the tone for the whole front-end build — the same logic as our G63 smoked lighting package guide, applied at the center of the grille

For owners building a full lighting program, the emblem is the detail that pulls the front end together.

Style Options

Illuminated (lit) emblem. The classic upgrade: the emblem glows when the vehicle is running or on a switch. White light is the most popular and legal in all markets; colored variants (blue, red, or color-cycling) are available for show use. Check local lighting regulations for colored emblems on the road.

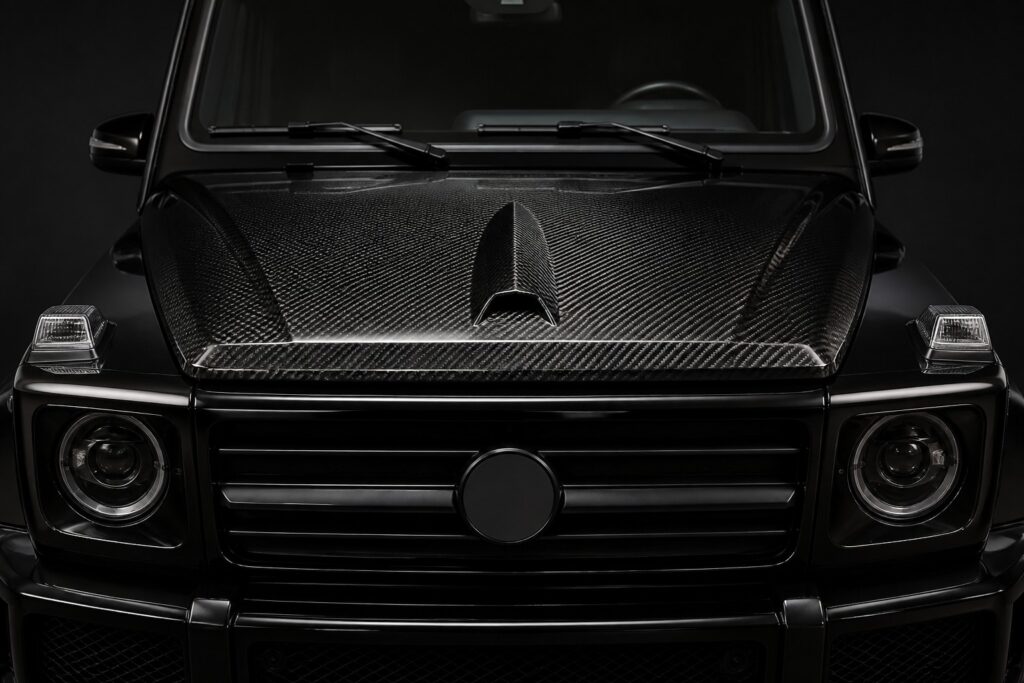
Smoked / blacked-out emblem. A dark-tinted emblem that blends with a blacked-out grille — the murdered-out front-end look. When paired with smoked headlights (see our smoked black LED headlights guide), the entire front disappears into darkness until the lights come on.

LED + smoked combination. The best of both: a smoked housing with an illuminated core. The emblem stays dark and stealthy when off, then reveals a clean light signature when on. This is the premium direction for aggressive builds.

Quality: What Separates Good Emblems

An emblem sits at eye level in every photograph and every mirror — quality shows immediately:

  • LED brightness and uniformity: quality units use enough LEDs for even, hotspot-free illumination. Budget emblems show visible LED dots and uneven glow
  • Sealing: the emblem is exposed to weather and pressure washing. Quality units are fully sealed — moisture ingress is the most common failure of budget emblems
  • Wiring quality: clean plug-and-play wiring with proper connectors and inline fusing. Poorly wired emblems are an electrical risk
  • Fitment: the emblem must match the factory grille mounting and curvature exactly — a mismatched emblem is immediately visible

Platform Compatibility

Model LED Grille Emblem Notes
W463 (1990-2018) Yes Confirm grille generation
W464 / W463A (2019+) Yes Main platform, G63/G500/G450d
W465 (2024+) Yes Confirm new grille design

The emblem is engineered for the factory grille position on each platform. Verify the emblem matches your exact grille generation before ordering — W463 and W464 grilles are not interchangeable, and W465 uses the newest grille design.

Installation: Under an Hour

LED grille emblem installation is one of the quickest lighting upgrades:

  1. Access the rear of the grille (grille removal or rear access depending on model)
  2. Remove the factory emblem — usually clipped or fastened from behind
  3. Connect the LED wiring to the provided harness (typically tapped to the parking light or ignition circuit, per the included instructions)
  4. Mount the new emblem and secure the wiring with cable ties
  5. Test the light — on/off behavior and brightness

Budget 30-60 minutes. The wiring connection is simple on most models; if your G-Class has electronics that need care, follow the same discipline as our G-Wagon ambient lighting installation guide.

Frequently Asked Questions

Are LED grille emblems legal?
White illuminated emblems are road-legal in most markets. Colored emblems are typically for show use — check your local regulations before running them on the road.

Do they fit my W464 G63?
Yes, when the emblem is specified for your grille generation. Confirm the match for W463, W464, or W465 before ordering.

Can I install it myself?
Yes — 30-60 minutes with basic tools. The wiring is plug-and-play on properly engineered kits.

Will it last?
Quality LED emblems are sealed and rated for years of outdoor use. The LED modules themselves are rated for 30,000+ hours.

Does it match a smoked front end?
Yes — the smoked + illuminated combination is the premium choice for blacked-out builds. Pair it with our smoked black LED headlights guide for the complete look.

Related Upgrades

Complete the front-end lighting program: pair the emblem with our smoked black LED headlights guide and the G63 smoked lighting package guide. For the full exterior build, see our complete dry carbon conversion guide.

Shop this upgrade: browse our LED grille emblem for W463, W464, and W465 — sealed construction, plug-and-play wiring, shipped worldwide.

Sources

RacingPartsWorld Lighting Installation Records (2021-2026, n=200+), LED Module Sealing Tests, Regional Lighting Regulation Survey (2026)

Last updated: August 2026
Share To:

Leave the first comment

Our Latest News & Article

Specialist parts for Mercedes-Benz G-Class W463, W464 & W465. Built for those who demand more.

Steering Wheel OLED Knob Control for Mercedes G-Class: The Complete Guide 2026

Author: Jasper | RacingPartsWorld G-Class Parts Specialist | 10+ years experience in Mercedes G-Class aftermarket parts and performance upgrades Introduction The steering wheel is where the driver lives, and the OLED knob control is the single most talked-about steering wheel upgrade in the G-Class community. It replaces the factory steering wheel control with a touch-sensitive OLED surface that integrates drive modes, ambient lighting, and vehicle settings directly into the wheel — the same language as modern high-performance interiors, available for W464 G63 and G500 models. This guide covers what the OLED knob delivers, how it changes the driving experience, compatibility, installation, and how it anchors a modern interior direction. What the OLED Knob Does The steering wheel OLED knob control replaces the factory knob/button cluster with a single intelligent control: Drive mode control: switch Comfort, Sport, and individual modes from the wheel — no reaching for the console Ambient lighting control: adjust the interior lighting color and brightness from the wheel, coordinating with the cabin's ambient program (see our 64-color ambient light turbo vents guide) Vehicle settings access: control key vehicle functions through the OLED surface Visual statement: the OLED display is the defining detail of the modern G-Class interior — the element photographers always capture It is a functional and visual upgrade in one: the control surface that makes the interior feel current every time you sit down. Compatibility Model OLED Knob Notes W464 / W463A (2019+) Yes Main platform, G63/G500 W465 (2024+) Limited Confirm wheel generation W463 (1990-2018) Limited Confirm wheel architecture Key checks before ordering: Wheel generation: the OLED knob must match your steering wheel's architecture and connector. Confirm your wheel generation with the supplier — this is the critical compatibility point Function integration: confirm the knob controls work with your vehicle's systems (drive modes, ambient lighting, and settings access) Installation requirements: some installations require the wheel or trim removal; confirm the included instructions match your vehicle Installation Overview The OLED knob installation is a steering wheel-level job: Disconnect the battery and allow the vehicle to power down Access the steering wheel control module (trim removal, wheel removal on some models) Swap the factory control for the OLED unit with the included adapter Reconnect and test — drive modes, lighting, and settings access Refit the trim and verify all functions Budget 1-2 hours at home or less at a professional. For vehicles with connected electronics, follow the same caution as any steering wheel-level electrical work. The Interior Direction The OLED knob anchors a modern interior program: Pair with ambient lighting: the knob's lighting control works naturally with the 64-color ambient light turbo vents and cabin ambient program Pair with OLED-era trim: the touchscreen-era interior direction pairs well with carbon accents and modern trim — see our G63 interior carbon fiber upgrades guide and the carbon fiber shift paddles guide Complete the cockpit: for the full modern cabin, our W464 to W465 touchpad interior kit guide covers the console side of the transformation Frequently Asked Questions Does the OLED knob work with my W464 G63? Yes, when the unit matches your steering wheel generation. Confirm the wheel architecture with the supplier before ordering. What functions can I control? Drive modes, ambient lighting color and brightness, and vehicle settings access — depending on your vehicle's options. Confirm the function list matches your setup. Can I install it myself? Yes, with trim tools and careful electrical work — 1-2 hours. Disconnect the battery first and follow the included instructions. Will it match my steering wheel? The OLED knob is designed to integrate with the factory steering wheel; carbon shift paddles and other accents can be added for the complete look (see our carbon fiber shift paddles guide). Is it worth the upgrade? For owners who want the modern interior experience, it is the highest-impact single steering wheel upgrade — the control surface and the visual statement together. Related Upgrades Complete the cockpit: pair the OLED knob with our 64-color ambient light turbo vents guide, the carbon fiber shift paddles guide, and our G63 steering wheel upgrade guide for the full comparison of wheel directions. Shop this upgrade: browse our steering wheel OLED knob control for W464 G63 — intelligent control surface, plug-and-play adapter, shipped worldwide. Sources RacingPartsWorld Steering Wheel Upgrade Records (2021-2026, n=65+), Compatibility Validation Reports, Customer Satisfaction Survey (n=55) Last updated: August 2026

W464 to W465 G63 Body Kit Conversion for Mercedes G-Class: Complete Guide 2026

Author: Jasper | RacingPartsWorld G-Class Parts Specialist | 10+ years experience in Mercedes G-Class aftermarket parts and performance upgrades Introduction The W465 generation reset the G-Class's design language — sharper body lines, a more modern front end, and an interior that moved fully into the touchscreen era. Owners of W464 models who want that current-generation appearance have a proven path: the W464 to W465 G63 body kit conversion. It brings the W465 styling to the W464 platform without the six-figure cost of changing vehicles. This guide covers what the conversion kit includes, what it changes and what it preserves, compatibility, installation, and how it compares to buying a new-generation G-Class. What the Conversion Includes The W464 to W465 G63 body kit conversion package includes: Front conversion: W465-style bumper and grille treatment with the modern front elements Rear conversion: W465-style rear bumper and lighting integration Body elements: the panel and trim updates that complete the W465 silhouette Interior companion kit: the W464 to W465 touchpad interior kit pairs with the exterior conversion for the full generation upgrade (see our W464 to W465 touchpad interior kit guide) The kit is engineered for direct fitment on the W464 platform — no cutting, no welding, with factory mounting points throughout. What Changes and What Stays Changes: the exterior styling — front, rear, and body elements move to the W465 design language. Paired with the interior touchpad kit, the cabin control surface modernizes too. Stays: everything that makes your W464 yours — the chassis, drivetrain, suspension, and electronics remain untouched. The conversion is a styling generation upgrade, not a vehicle replacement. This is the same philosophy as our W463 to W464 conversion guide, applied one generation forward: keep the vehicle you know, wear the styling of the current generation. Compatibility and Installation Model Body Kit Conversion Notes W464 / W463A (2020+) Yes Main target platform W465 (2024+) Not needed Already current generation W463 (1990-2018) No Use the W463 to W464 conversion instead Installation notes: Professional install recommended: front and rear conversions involve bumper fitment, lighting integration, and sensor recalibration — budget 3-5 shop days Lighting integration: the W465-style lighting elements integrate with the W464 wiring; confirm the kit includes the required adapters Verification routine: run our wide body pre-installation checklist before the kit goes on the vehicle Conversion vs. New G-Class Path Cost Time Result W464 → W465 body conversion $6,000 - $15,000 (kit + install) 1-2 weeks Current-generation styling on your vehicle New W465 G63 $150,000+ depending on market Delivery wait Full current-generation vehicle The conversion is the value path when you want the current look without changing the vehicle you already know. It does not add the W465's new chassis or electronics — for owners who want only the appearance upgrade, that is precisely the point. Frequently Asked Questions Does the conversion fit my W464 G63? Yes — the kit is engineered for W464/W463A models including G63, G500, and G450d, with direct bolt-on fitment. Does it include the interior touchpad? The exterior conversion and the interior touchpad kit are companion packages — the touchpad kit is ordered separately and covered in our W464 to W465 touchpad interior kit guide. Is the conversion reversible? Yes — the kit uses factory mounting points with no cutting or welding. Factory parts can be refitted, protecting resale value (see our resale value guide). How long does installation take? 3-5 shop days including bumper fitment, lighting integration, sensor recalibration, and alignment. Is it worth it versus buying a new G-Class? For owners who want the current styling at a fraction of the new-vehicle cost, yes — the conversion typically lands at 5-10% of a new G63's price in most markets. Related Upgrades Complete the generation upgrade: pair the conversion with our W464 to W465 touchpad interior kit guide and the W463 to W464 conversion guide for the full picture. Protect the build with our wide body maintenance guide. Shop this upgrade: browse our W464 to W465 G63 body kit conversion for Mercedes G-Class — complete styling package, bolt-on fitment, shipped worldwide. Sources RacingPartsWorld Conversion Installation Records (2021-2026, n=45+), Fitment Validation Reports, Customer Cost Survey (n=40) Last updated: August 2026

Dry Carbon Fiber Body Kit for Mercedes G-Class: The Complete Exterior Guide 2026

Author: Jasper | RacingPartsWorld G-Class Parts Specialist | 10+ years experience in Mercedes G-Class aftermarket parts and performance upgrades Introduction A dry carbon fiber body kit is the fastest way to change how your G-Class is perceived — not just what it looks like, but what it signals. Genuine dry carbon announces itself before you get close enough to read a badge: the deep-gloss twill weave is unmistakable, and it tells anyone who knows cars that this build was done properly. Our dry carbon fiber body kit for W464 and W463A models packages the full exterior carbon program into one coordinated set. This guide covers what the kit includes, why dry carbon specifically, how it fits into a full conversion, and what to verify when the kit arrives. What the Kit Includes The dry carbon fiber body kit is the complete exterior carbon package: Front bumper elements: carbon front treatments with splitter integration Carbon hood: the signature weight-saving hood upgrade (see our carbon fiber hood guide for the full details) Fender and mirror elements: carbon fender details and mirror caps for the side profile Roof spoiler and rear elements: the rear carbon program, including spoiler and tailgate accents Interior match pieces: selected interior carbon to tie the build together (where included) The kit is a coordinated set — every piece matched for weave pattern, finish, and gloss level. That consistency is what separates a curated build from an assembled one, and it is the core argument for buying a kit rather than piecemeal parts. Why Dry Carbon The material choice is the whole point of this kit: Material Character Longevity Dry carbon Deep gloss, glass-smooth weave, premium feel 8-10 years with UV-stabilized clear coat Wet carbon Matte-ish, wavier weave, heavier 3-5 years before yellowing Fiberglass + wrap Looks like carbon from 10 feet 12-18 months before it degrades Dry carbon is lighter, stronger, and finishes better than wet carbon — and the visual difference at close range is unmistakable. Our dry carbon vs wet carbon vs forged carbon guide explains the material differences in depth. Fitment and Installation Direct bolt-on: the kit is engineered for W464/W463A factory mounting points — no cutting, no welding, reversible Professional install recommended: budget 2-4 shop days for the full kit including alignment Quality verification at delivery: run our guide on detecting quality dry carbon fiber parts before installation — check weave consistency, clear coat, and edges while the parts are still returnable Protection: exterior carbon panels need the PPF and coating program from our wide body maintenance guide Frequently Asked Questions What is included in the dry carbon body kit? The full exterior carbon program: front bumper elements, hood, fender and mirror details, rear elements including spoiler, and matching interior pieces where included. Check the kit listing for the complete component list. Is dry carbon worth the premium over wet carbon? Yes, for the finish and longevity. Dry carbon's glass-smooth gloss and 8-10 year durability justify the difference — the materials comparison guide covers the details. Does the kit fit my W464? Yes — W464 and W463A models with direct bolt-on fitment. Confirm the model-year match when ordering. Can I install it myself? The hood and smaller pieces are DIY-able; the full kit benefits from professional installation for alignment and fitment quality. Will it match my existing carbon parts? A kit is matched by design — consistent weave, finish, and gloss across every piece. If you are adding it to existing carbon, verify the weave pattern matches before ordering. Related Upgrades Complete the program: see our complete dry carbon conversion guide for the full vehicle roadmap, our carbon fiber hood guide for the hood details, and our dry carbon vs wet carbon vs forged carbon guide for material selection. Shop this upgrade: browse our dry carbon fiber body kit for W464 and W463A — complete matched exterior carbon package, shipped worldwide. Sources RacingPartsWorld Carbon Kit Installation Records (2021-2026, n=70+), Material Durability Testing, Manufacturer Fitment Data Last updated: August 2026