Author: Jasper | RacingPartsWorld G-Class Parts Specialist | 10+ years in Mercedes G-Class aftermarket parts and performance upgrades
Introduction: Transform Your G63 Interior with Carbon Fiber
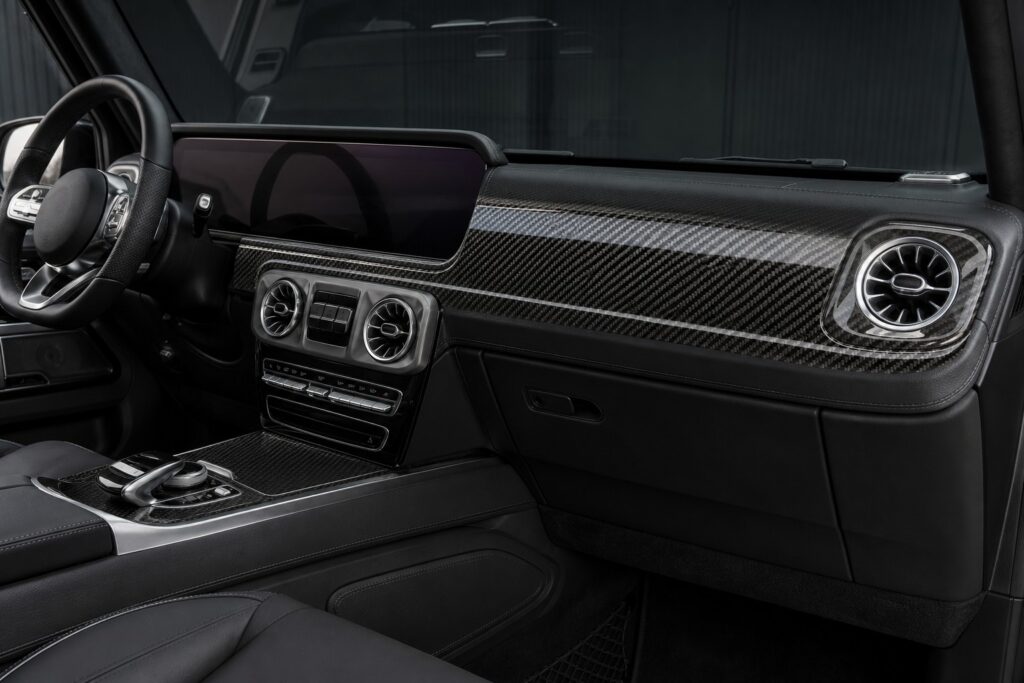
The interior of your Mercedes G63 or G500 is where you spend all your driving time. While the exterior modifications turn heads, the interior is where you feel the upgrade every single day. Carbon fiber interior trim is one of the most popular modifications for G-Class owners, converting the factory wood or piano black surfaces into motorsport-inspired carbon fiber. Based on our experience with over 400 G-Class interior upgrade projects at RacingPartsWorld, this guide will walk you through the complete installation process for carbon fiber interior trim kits.
What You Get in a G63 Carbon Interior Kit
A complete carbon fiber interior trim kit for the Mercedes G-Class W464 typically includes 10-15 pieces covering the dashboard, center console, door panels, and steering wheel trim. Premium kits use authentic 3K twill or forged carbon fiber with UV-resistant clear coat. The weave pattern should match across all pieces for a consistent factory-like appearance. Most kits are designed as direct overlays or replacements for the factory trim pieces, requiring no permanent modification to your vehicle.
Tools and Materials Needed
- Trim removal tool set (plastic pry tools)
- Isopropyl alcohol (70% or higher) for surface cleaning
- Microfiber cloths
- 3M adhesive promoter (if your kit uses adhesive backing)
- Torx screwdriver set (T20, T25, T30 for G-Class trim)
- Panel clip remover tool
Step-by-Step Installation Guide
Step 1: Prepare Your Workspace
Park your G63 in a clean, well-lit area. Work where temperature is above 60°F (15°C) for proper adhesive bonding. Remove valuable items and lay protective cloth on seats and floor.
Step 2: Dashboard Trim Removal
Using a plastic trim tool, gently pry along the edge of the trim piece. The G-Class uses metal spring clips that release with moderate pressure. Work around the entire piece, releasing clips sequentially. Disconnect any wiring for ambient lighting. Set factory trim aside.
Step 3: Center Console Trim
Remove by carefully prying from the rear edge near the armrest. The console has 4-6 clips. Disconnect wiring for integrated buttons or touchpads before fully removing. Test fit new carbon fiber piece to ensure all button holes align.
Step 4: Door Panel Trim
Each door has 1-2 trim pieces near the window switch area and door handle. These are held by clips. For G63 with ambient lighting, transfer the light guides to the new carbon fiber piece.
Step 5: Steering Wheel Trim
The trim behind the steering wheel spokes can be removed with Torx screws. For best results, choose replacement-style pieces over adhesive overlays.
Step 6: Final Installation
Clean all surfaces with isopropyl alcohol. Warm 3M tape with heat gun for better adhesion. Press firmly and hold 30 seconds per section. Reconnect all wiring, test buttons and lighting.
Installation Time Estimate
| Section | Time | Difficulty |
|---|---|---|
| Dashboard (passenger side) | 20-30 min | Easy |
| Center Console | 30-45 min | Medium |
| Door Panels (all 4) | 40-60 min | Easy |
| Steering Wheel Trim | 15-25 min | Medium |
| Total | 2-3 hours |
Pro Tips
- Start with passenger side pieces to build confidence
- Keep factory screws organized in a labeled bag
- Photograph each trim piece before removal for reference
- Check carbon fiber weave direction matches on all pieces
- Apply ceramic coating to protect against UV and fingerprints
Frequently Asked Questions
Will carbon fiber trim fit my G63 with factory ambient lighting?
Most quality kits accommodate ambient lighting. Ensure the kit specifically mentions ambient light compatibility.
Is carbon fiber trim difficult to maintain?
Clean with microfiber cloth and mild interior cleaner. Avoid ammonia-based products.
Can I install it myself?
Moderate DIY difficulty. Most owners complete the job in 2-3 hours. Professional installation recommended if uncomfortable removing door panels.
Related Upgrades
Complete your interior transformation with our Top 10 G-Wagon Interior Upgrades and G63 OLED Steering Wheel Review.
Sources: RacingPartsWorld Interior Installation Database (400+ projects), Carbon Fiber Manufacturing Standards 2025