LED Fog Light Turn Signal DRL for Mercedes G-Class: Complete Guide 2026

Author: Jasper | RacingPartsWorld G-Class Parts Specialist | 10+ years experience in Mercedes G-Class aftermarket parts and performance upgrades

Introduction

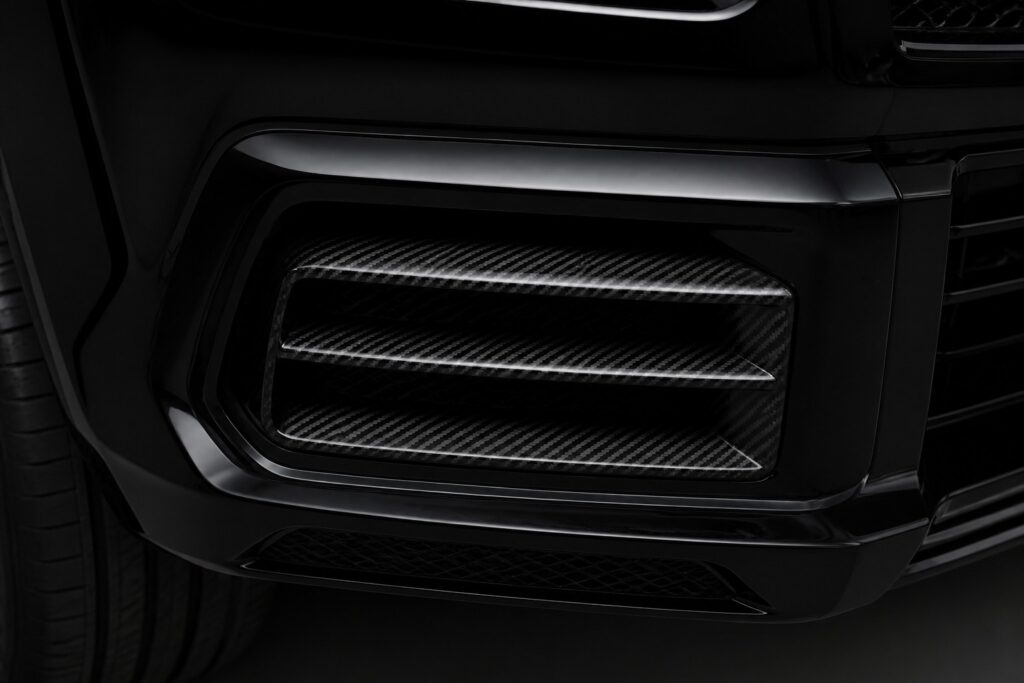
The front bumper fog light positions are one of the G-Class’s most versatile upgrade points — and the LED fog light turn signal DRL unit makes the most of them. This front bumper upgrade combines three functions in one housing: bright LED fog lights, integrated turn signal function, and daytime running light illumination. Built for W463 and W464 models, it upgrades both the light output and the front-end look in one install.

What the Upgrade Is

The LED fog light turn signal DRL is a front bumper lighting upgrade:

  • LED fog light function: modern LED output replaces the dated factory fog lighting with brighter, cleaner illumination
  • Integrated turn signal: turn signal function built into the housing adds an extra signal position at the bumper level
  • DRL element: daytime running light illumination gives the front end a modern light signature during the day
  • Multi-function design: three lighting roles in the factory fog light position — one install upgrades the whole front lighting story

Why the Fog Light Position Matters

The bumper fog positions are prime real estate:

  • The functional upgrade: fog lighting is a genuine safety function — LED output improves visibility in fog, rain, and low light, the conditions the G-Class meets year-round (see our G-Class winter preparation guide)
  • The front light signature: the DRL element matches the modern light language — the same direction as our LED grille emblem upgrade and smoked black LED headlights guide
  • Fill the front end: upgraded bumper lighting completes the front treatment between the headlights and the lower bumper elements

Fitment and Installation

Model Fog Light Fitment
W463 (1990-2018) Yes
W464 / W463A (2019+) Yes

Installation is a bumper-position swap:

  1. Access the factory fog light housing from behind the bumper
  2. Disconnect and remove the factory unit
  3. Install the LED unit with the included adapters
  4. Connect the functions — fog, turn signal, and DRL circuits per the instructions
  5. Test all three functions before refitting the bumper trim

Budget 1-2 hours at home or less at a professional. The multi-function wiring rewards careful installation — confirm each circuit before final assembly.

Building the Light Program

The fog position upgrade works with the wider light theme:

  • Pair with smoked lighting: on a smoked build, the LED fog units keep the front lighting bright where smoked headlights darken it — a functional balance (see our smoked black LED headlights guide)
  • Pair with the grille and emblem: the LED grille emblem and bumper elements complete the front light story — see our LED grille emblem upgrade guide
  • Function quality first: any lighting upgrade should maintain or exceed factory function — multi-function LED units deliver on all three roles

Frequently Asked Questions

Does the unit fit my W463 or W464?
Yes — the LED fog light turn signal DRL is available for the W463 and W464 generations. Confirm the bumper architecture when ordering.

Is the wiring complex?
The unit connects fog, turn signal, and DRL circuits — the wiring rewards care. Home installers comfortable with lighting circuits handle it; a professional guarantees the cleanest integration.

Are the DRL and turn signal street-legal?
The unit is designed to maintain legal function across its roles — confirm local regulations on lighting color and position before installation.

Will it match my existing LED lights?
Yes — the LED output pairs with modern LED headlights and grille lighting for a coherent front end.

How long does installation take?
1-2 hours at home — a bumper-position swap with three circuit connections.

Shop This Upgrade

Browse our LED fog light turn signal DRL for W463 and W464 G-Class — three functions in the factory fog position, shipped worldwide.

Sources

RacingPartsWorld Lighting Records (2023-2026, n=50+), Fitment Validation Data, Customer Build Documentation

Last updated: September 2026
Share To:

Leave the first comment

Our Latest News & Article

Specialist parts for Mercedes-Benz G-Class W463, W464 & W465. Built for those who demand more.

Carbon Fiber Hood with Shark Fin for Mercedes G-Class: Complete Guide 2026

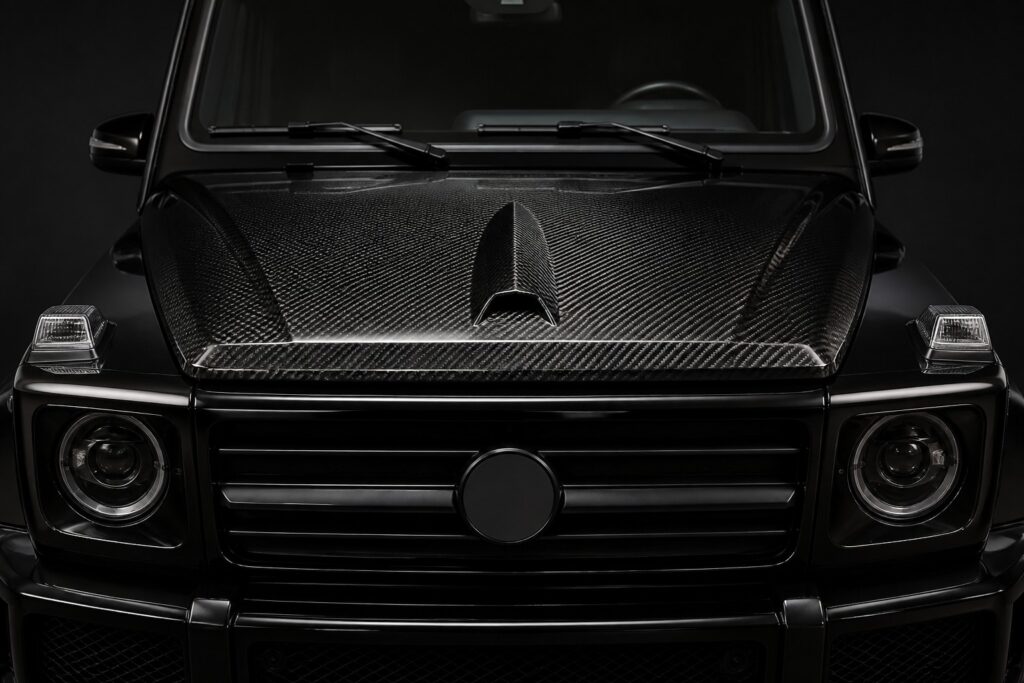
Author: Jasper | RacingPartsWorld G-Class Parts Specialist | 10+ years experience in Mercedes G-Class aftermarket parts and performance upgrades Introduction The G-Class hood is a large, flat, vertical-faced panel — and that is exactly why it responds so well to a vented carbon replacement. The carbon fiber hood with shark fin replaces the factory steel hood with a dry carbon panel carrying a shark fin vent: the raised fin detail that breaks the flat surface and gives the front end the aggressive vented profile of the wide body builds. Engineered for the W464 and W463 G500 and G63, it is the upgrade that changes the front end more than any trim piece can. What the Upgrade Is The carbon fiber hood with shark fin is a major front-end body panel upgrade: Genuine dry carbon hood: the panel replaces the factory hood with dry carbon construction carrying the deep-gloss twill signature Shark fin vent: the raised fin detail adds a vented profile to the hood surface — the design element that distinguishes this hood from a flat carbon replacement Weight reduction: the dry carbon panel is substantially lighter than the factory steel hood Fitment: engineered for the W464 and W463 G500 and G63 Why the Hood Leads a Build The hood is the largest single body panel on the front of the vehicle: The biggest single visual change: a carbon hood alters the front end more than any set of trims — our best carbon fiber hoods for G-Wagon guide covers how the hood option compares within the category A vented profile: the shark fin adds a functional-looking design line to a surface that is otherwise plain steel — the front end gains depth from the moment the panel is fitted Material at scale: on a hood-sized panel, the carbon weave is visible in a way that no small trim can match — the material story reads at a distance Partner to the body kit: hood, front splitter, and wide body arches together form the front-end package — see our dry carbon fiber body kit guide Fitment, Fitment Discipline, and Installation Model Hood Fitment W464 G500 / G63 Yes W463 G500 / G63 Yes Installation is a body-panel project — this is not a trim swap: Remove the factory hood and transfer the hinges, latch hardware, and any hood-mounted components Test-fit the carbon hood with shims before final alignment — panel gap consistency is the whole job Align the panel to the fender and grille gaps on both sides Transfer the hood struts and confirm the hood opens, holds, and latches correctly Finish and seal — clear coat care and edge sealing protect the panel long-term Professional body-shop installation is recommended. Budget 3-5 hours with finishing. A hood that does not align perfectly is more visible than any other imperfect panel on the vehicle. The Vented Carbon Front The hood leads the front-end program: Complete the front end: pair the hood with the front splitter, headlight-level carbon, and bumper pieces for a full carbon front — see our carbon fiber exterior accents guide Add the light layer: carbon hood and lighting upgrades work together as the two front-end signatures — see our dry carbon LED DRL headlight frames guide Engine bay context: a carbon hood sits above the engine bay, where an engine cover completes the presentation — see our G63 carbon fiber engine cover upgrade guide Care from day one: a hood takes stone chips, UV, and heat — the cleaning and protection discipline in our wide body maintenance guide applies with extra attention at the leading edge Frequently Asked Questions Does the hood fit my W464 or W463 G500 or G63? Yes — the carbon fiber hood with shark fin is engineered for the W464 and W463 G500 and G63. Is it a direct bolt-on replacement? The hood replaces the factory panel and reuses the hinges, latch, and struts — professional alignment is recommended for correct panel gaps. Does the hood reduce weight? Yes — dry carbon construction is substantially lighter than the factory steel hood. Is the vent functional? The shark fin is a design element that also provides venting at the hood surface — airflow benefits depend on your installation and engine bay setup. Will the hood need painting? No — the panel is finished in dry carbon and clear coat; no paint is required. Shop This Upgrade Browse our carbon fiber hood with shark fin for W464 and W463 G500 and G63 — dry carbon vented hood panel, shipped worldwide. Sources RacingPartsWorld Body Panel Records (2022-2026, n=40+), Fitment Validation Data, Customer Build Documentation Last updated: September 2026

Carbon Fiber Front Dashboard Panel for Mercedes G-Class: Complete Guide 2026

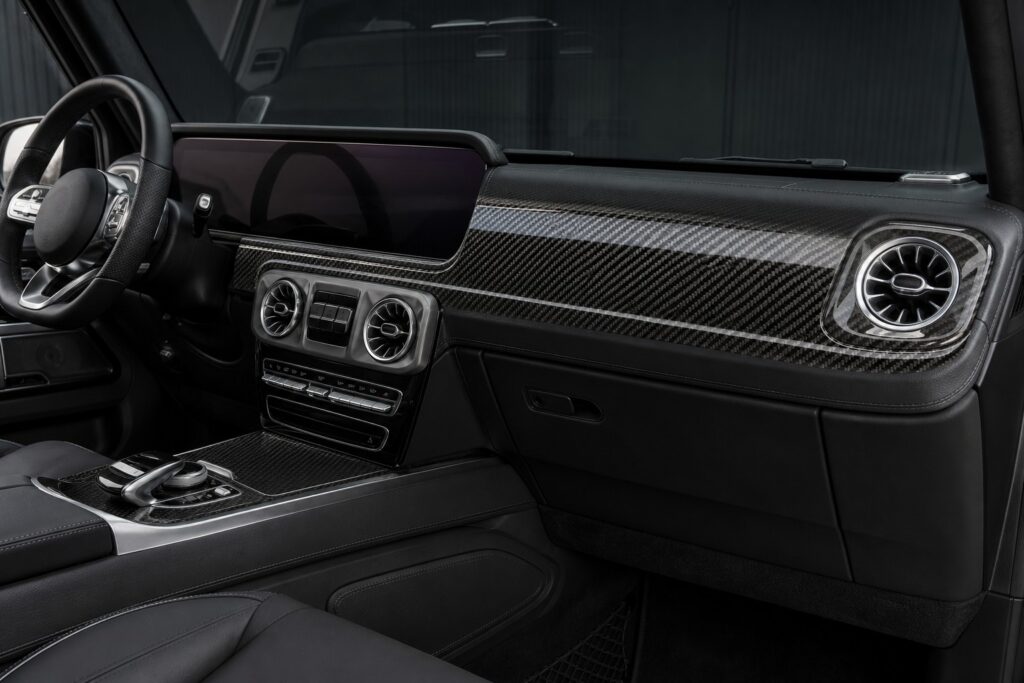
Author: Jasper | RacingPartsWorld G-Class Parts Specialist | 10+ years experience in Mercedes G-Class aftermarket parts and performance upgrades Introduction The dashboard is the single largest interior surface in the G-Class cabin — and on the W464 and W463A it is finished in factory materials that no passenger ever remarks on. The carbon fiber front dashboard panel changes that. The panel replaces the dashboard trim surface with genuine dry carbon, turning the widest surface in the cabin into the strongest statement in it. Built for the W464 and W463A G63, G550, and G500 (2019-2025), it is the interior upgrade that the front-seat view never recovers from. What the Upgrade Is The carbon fiber front dashboard panel is a primary interior surface upgrade: Genuine dry carbon: the panel is finished in dry carbon with the deep-gloss twill signature, laid out across a large surface where the weave is fully visible The widest interior upgrade: the dashboard spans the full cabin width — no other carbon piece covers as much visible area W464 and W463A fitment: engineered for the W464 and W463A G63, G550, and G500 (2019-2025) The anchor of the cabin: the panel becomes the reference point the rest of the interior carbon is read against Why the Dashboard Is the Priority Piece If a cabin build starts anywhere, it starts here: Maximum visibility per piece: a passenger sees the dashboard from every seat, every journey — no other interior carbon piece gets this exposure The weave shows properly: on a large flat panel the twill pattern reads clearly, which is what makes quality carbon visible — see our guide on detecting quality dry carbon fiber parts for what a good weave looks like across a big surface It sets the cabin's material language: once the dashboard is carbon, the door panels, console, and seat pieces follow logically — this is the layering principle in our G63 interior carbon fiber upgrades guide Factory-clean alternative: unlike a wrapped finish, a genuine dry carbon panel delivers the reflection and depth that identifies real carbon at a glance Fitment and Installation Model Dashboard Panel Fitment W464 G63 / G550 / G500 Yes (2019-2025) W463A Yes Installation is an interior trim project: Disconnect the battery before working around dashboard trim and connectors — the discipline covered in our W465 interior trim kit direction Remove the factory dashboard trim at the clip and fastener points, using proper trim tools Test-fit the carbon panel and confirm alignment with vents, screens, and grab handle openings Mount the panel and secure it at all points Refit the trim and verify every opening lines up and no rattle exists Budget 2-3 hours at a professional, longer for a first-time DIY install. The dashboard surrounds screens, vents, and switches — rushed work here risks both the panel and the factory trim underneath. Building the Interior Around It The dashboard panel is the foundation of the cabin program: Continue across the cabin: door panels, door sill guards, and console pieces extend the material — see our carbon fiber door panel guide and LED door sill guards guide Add the seats: seat backrests and seat side covers bring the carbon to the seat line — see our carbon fiber seat backrest upgrade guide Coordinate the light: ambient elements sit beside carbon naturally — see our 64-color ambient light turbo vents guide See the full menu: for how the dashboard fits into the complete interior build order, see our top interior upgrades guide Frequently Asked Questions Does the panel fit my W464 or W463A? Yes — the carbon fiber front dashboard panel is engineered for the W464 and W463A G63, G550, and G500 (2019-2025). Does it interfere with the vents, screens, or grab handle? No — the panel is shaped around the factory dashboard openings and features. Is it a replacement or an overlay? The panel upgrades the dashboard trim surface — confirm the exact installation method on the product page for your model year. Will the weave match my existing carbon interior pieces? Yes, when the weave matches your existing pieces — see the consistency guidance in our guide on detecting quality dry carbon fiber parts. Can I install it myself? It is a two-to-three hour trim project that surrounds screens and switches — possible DIY work, but a professional guarantees the cleanest result. Shop This Upgrade Browse our carbon fiber front dashboard panel for W464 and W463A G63, G550, and G500 (2019-2025) — the anchor piece of a full carbon cabin, shipped worldwide. Sources RacingPartsWorld Interior Records (2023-2026, n=50+), Fitment Validation Data, Customer Build Documentation Last updated: September 2026
Dry Carbon Front Bumper Vent Covers for Mercedes G-Class W465: Complete Guide 2026

Author: Jasper | RacingPartsWorld G-Class Parts Specialist | 10+ years experience in Mercedes G-Class aftermarket parts and performance upgrades Introduction The W465 front bumper carries a set of vent inserts at the lower corners — functional openings finished in factory plastic. On an otherwise built front end, those plastic vents are the detail that gives the build away. The dry carbon front bumper vent covers for the W465 replace them with genuine dry carbon inserts, bringing the material signature to the bumper's own ventilation features. Built for the 2025 W465 G500 and G63, it is the small front-end upgrade with an outsized effect. What the Upgrade Is Dry carbon front bumper vent covers for the W465 are a front-end detail upgrade: Genuine dry carbon inserts: the covers replace the factory bumper vent trim with dry carbon pieces carrying the deep-gloss twill signature Vent function preserved: the covers are shaped to the vent openings, keeping the ventilation path intact W465-specific fitment: engineered for the W465 G500 and G63 (2025) bumper architecture — the newest G-Class generation Front-end completion: the covers finish the last plastic surface on a carbon-built front end Why the W465 Front Needs These The W465 is the newest G-Class and the one with the most plastic front detailing: The newest generation gets the least aftermarket support: most parts are still made for the W464 — W465 owners have a narrow catalog, and this is the reason our W465 dry carbon LED DRL headlight frames guide and W465 carbon fiber interior trim kit guide matter The visibility position: the bumper vents sit directly below the headlights, in the eye line of anyone looking at the front of the vehicle Consistency reads as quality: a build with carbon headlight frames, carbon grille details, and plastic bumper vents has an obvious gap — the vent covers close it (see our complete dry carbon conversion guide for the full-package standard) No mechanical compromise: the covers fit the vent openings rather than blocking them, so the bumper's original function is untouched Fitment and Installation Model Bumper Vent Cover Fitment W465 G500 Yes (2025) W465 G63 Yes (2025) Installation is a bumper-trim job: Clean and prepare the vent surround at the bumper opening Test-fit the carbon cover against the vent shape Mount the cover using the recommended method for the trim position Verify the vent opening remains clear and the cover sits flush on all edges Budget 30-60 minutes. Confirm the model year when ordering — W465 bumper detailing can differ across trims. The W465 Carbon Front The vent covers work as part of the W465 front program: Layer the front: pair with the dry carbon LED DRL headlight frames for the headlight-level piece — see our dry carbon LED DRL headlight frames guide Add the light detail: carbon fog light frames with LED complete the lower front — see our dry carbon fog light frames guide Continue the material: carbon exterior accents across the body connect the front to the rest — see our carbon fiber exterior accents guide Protection reality: bumper-level carbon sits in the stone-chip zone — the care routine in our wide body maintenance guide applies from day one Frequently Asked Questions Do the covers fit my W465? Yes — the dry carbon front bumper vent covers are engineered for the W465 G500 and G63 (2025). Do they block the bumper vents? No — the covers are shaped to the vent openings and preserve the ventilation path. Will they fit a W464 bumper? No — the covers are shaped for the W465 bumper architecture. W464 owners should use W464-specific front pieces. How are they mounted? The mounting method is detailed on the product page — the position is a trim-level fit at the bumper opening. Can I install them myself? Yes — 30-60 minutes with basic trim tools. Shop This Upgrade Browse our dry carbon front bumper vent covers for the W465 G500 and G63 (2025) — genuine dry carbon vent trim for the newest G-Class front end, shipped worldwide. Sources RacingPartsWorld W465 Front Records (2025-2026), Fitment Validation Data, Customer Build Documentation Last updated: September 2026